I made this quilted bookmark this morning and decided to share the process with my blog readers! It's a lot of fun and SEW simple!!!
Use a ruler to draw your bookmark whatever size you want it to be. Then cut it out.
Gather little scraps of fabric and a glue stick. Cover the bookmark with glue from the glue stick.
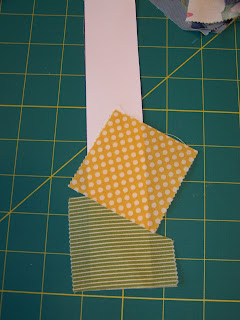
Begin positioning the scraps of fabric onto the cardboard until the entire bookmark is covered in fabric pieces.
Cut off the excess fabric hanging over the sides of the cardboard.
It will look like this.
Then use a zig zag stitch on your machine to zig zag over every raw edge - except the outside edges.
Then, cover the entire back of the bookmark with glue from your glue stick.
Zig zag stitch around the outside edges of your bookmark.
Use Fray Check around the outside of your bookmark to secure your stitching.
Your finished quilted bookmark will look like this!
The possibilities are limitless and it's such an easy project! :-)


Just found your blog & am your newest follower:) I'm also from PA, not far from Reading...you can follow me back if you'd like to at:
ReplyDeletehttp://www.rockpaperscissorscreate.blogspot.com